
UICapture is lecture capture software that uses Panopto software. You can use UICapture to create digital recordings of audio, video, and screen content on a Windows or Macintosh computers. Viewers can watch the presentations using a browser on a Windows or Macintosh computer.
To create a recording you need both the recorder software and an account on the UICapture server. Engineering faculty and staff can request an account using the form linked below. Students should have a faculty or staff sponsor to create and distribute recorded sessions.
Request folder/add student
Use this form to request that ECS create a UICapture folder or add students to an existing folder.
Instructions
Record, Pause, and Stop
Download the Windows or Mac version of the UICapture Recording software from the ITS software site. Install the recorder.exe file.
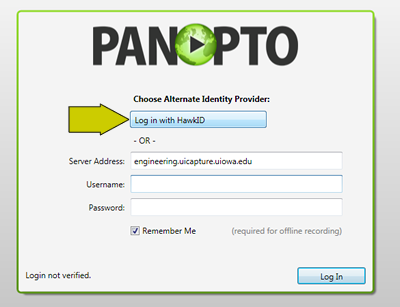
Start the Panopto Recorder. Change the Server Address: to engineering.uicapture.uiowa.edu and click the Save button to the right of that field. Then click the button labeled Log in with HawkID above the Server Address area. The HawkID Login screen opens; enter your Hawk ID and password.
Set the Primary and Secondary sources from the left side of the screen. Name the session in the field labeled "Record a new session called:"; the default is the day of week, date, and time. See the orange arrow in the screen capture below.
If you want people to see and hear your presentation as you give it, click the Webcast and Record button, circled in orange, above the down arrow to select the folder.
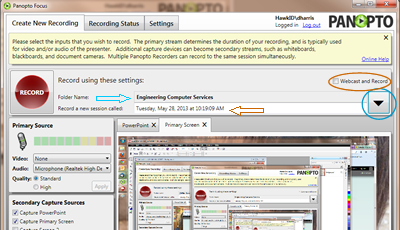
If you select the folder the recording belongs to, it will automatically be uploaded to that folder. Click the down arrow, circled in blue above to see the list of folders you have access to, as shown above. Click Add New Session (circled in orange below).
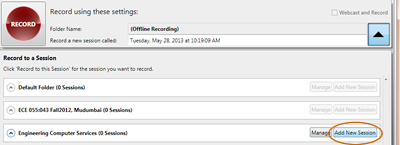
Once the folder has been selected, as in the illustration above by the blue arrow, the folder name appears; the default folder name is (Offline Recording).
Click the red "Record" button to start the recording, the green "Pause" button to pause the recording, and the black "Stop" button to end recording.
Note that if you embed video clips that include sound, such as YouTube recordings, the audio portion of those clips will not be recorded while you are capturing audio from line in (USB or other microphone).
See the detailed instructions for Windows or Mac. Those instructions have information on sharing a recording using ICON, which consists of copying the Viewer link from UICapture into the ICON course site.
Upload
The default setting is to upload automatically. If you have set the appropriate folder (see above), once you stop the recording, Panopto begins processing the lecture for upload. Once the green bar under Upload Progress on the Recording Status page disappears, it is safe to log out. If you log out before the recording has uploaded, you can finish the upload by logging in later.
If you record lectures on a laptop, note that you may have trouble getting the files to upload to the Panopto server over wireless. If you can use an Ethernet connection to upload, that is best. If your file(s) do not upload, try again later.
Log Out
If you have changed the default folder or other settings, exit by clicking the Log Out link at the top right of the UI Capture screen. If you exit by clicking on the X in the upper right corner, your settings will not be saved.
Using a Document Camera
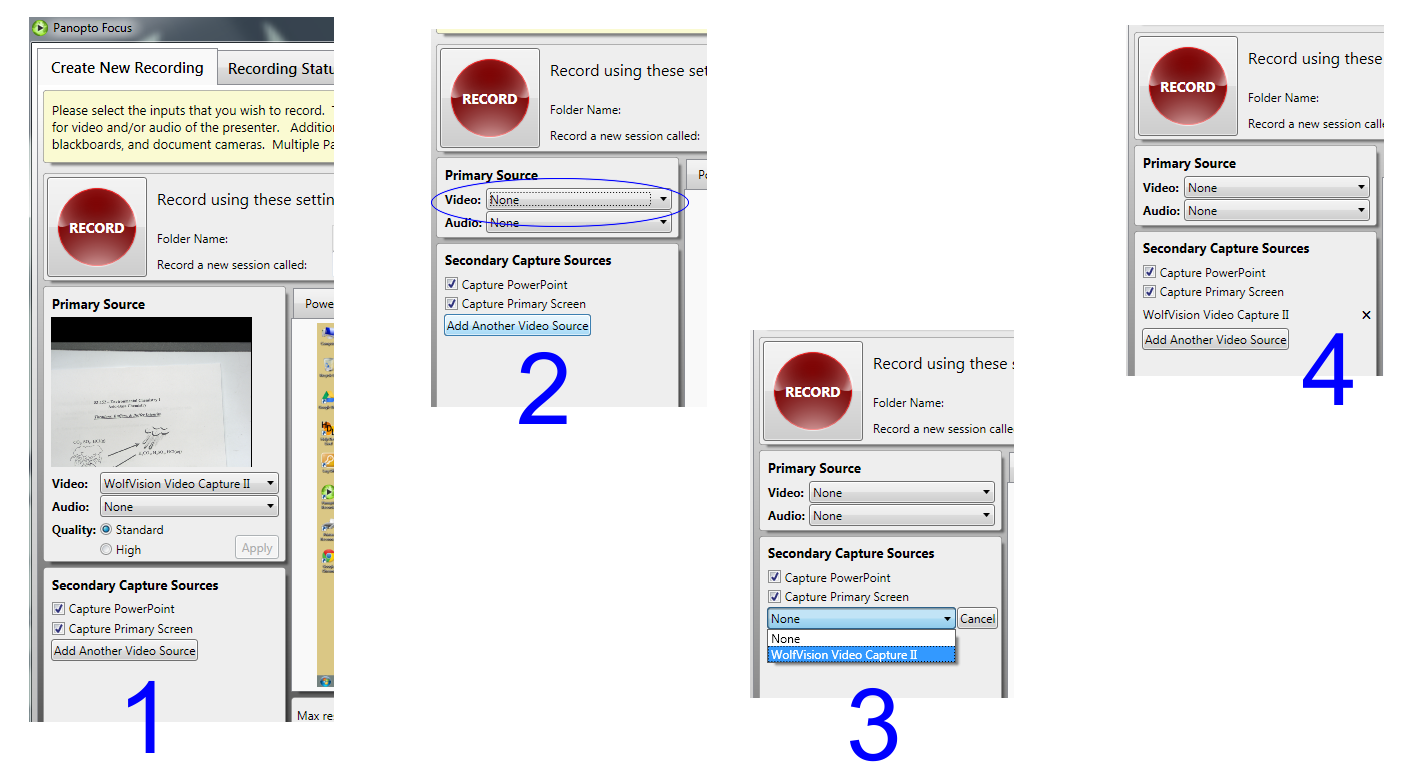
If you use a document camera as part of the recorded lecture, before you start recording, set it up as described here. The default settings are shown in 1. Change the Primary Source video to none, as in 2. Select Add Another Video Source in the Secondary Capture Sources area below the Primary Source, and using the pull-down menu, 3, choose the document camera; in this example it is WolfVision Video Capture II. When the settings look like illustration 4, you can begin the recording.
Viewing Recordings
You need a browser and Silverlight to view UICapture recordings, as well as a link to the recording and permission to view the recordings. ECS has a very quick way to import students from an ICON course site as viewers of course recordings (see form above).
Recording Links
You need a browser and Silverlight to view UICapture recordings, as well as a link to the recording and permission to view the recordings. ECS has a very quick way to import students from an ICON course site as viewers of course recordings (see form above).
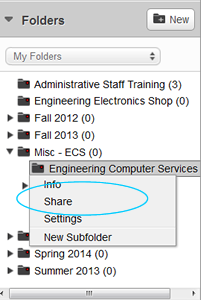
To find the recording link to the entire folder, login to engineering.uicapture.uiowa.edu and find the appropriate folder in the folder listing at the left of the screen. Right click to get the options Info, Share, Settings, and New Subfolder. Select Share. In the folder settings that displays, at the top right is a link that will say Make Public.

Click that link and you get the public URL. Copy that and paste as needed. You may want to make the folder private again by clicking the Make Private link at the top right.
To find the link for individual recordings, click the Settings icon (a gear) to the right of the recording when you login to engineering.uicapture.uiowa.edu.
The sessions settings you see includes the Viewer link. Copy that and paste as needed.

Help
For help using UICapture, talk a consultant at the Engineering Help Desk, 1253 SC, 319-335-5055.
Read ITS support information about UICapture.
Read Panopto support information.