
Scheduling Meetings
There are a few ways to schedule meetings. To make it consistent and most reliable, we recommend that you use the University of Iowa Zoom account URL, https://uiowa.zoom.us, as the starting point. Complete the following steps to schedule a meeting:
- Click Sign In and complete the sign in process.
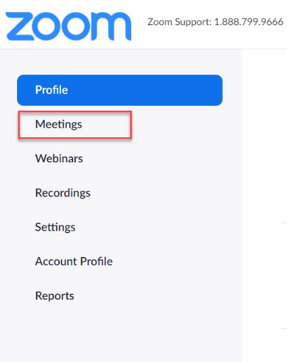
- Click Meeting from the left navigation controls.
The Zoom meeting window appears. We’ll address each of the options listed from left to right, focusing first on completing the schedule of a new meeting.
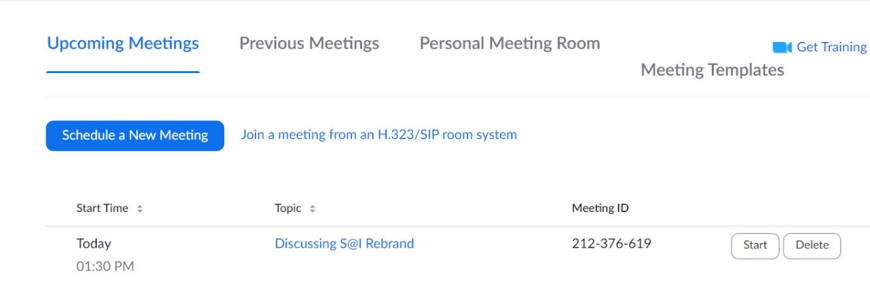
Upcoming Meetings
The Schedule a Meeting button will be at the top with any upcoming Zoom meetings appearing below.
- Click Schedule a New Meeting.
The Schedule a Meeting page appears.
- Select your meeting settings.
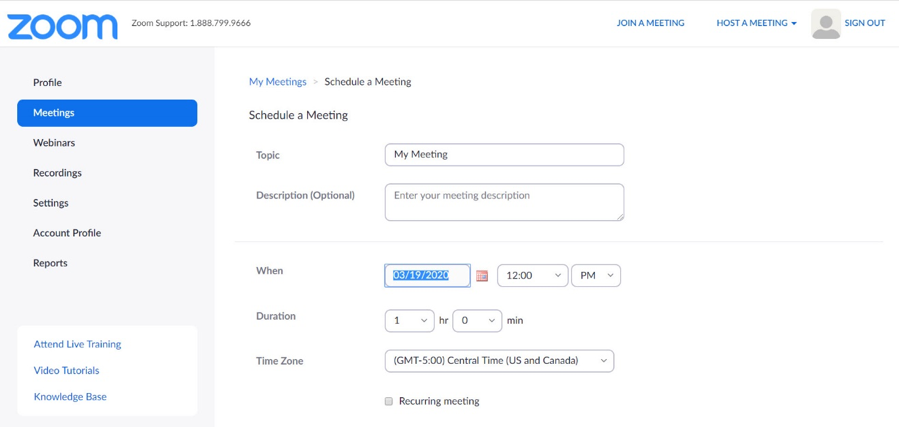
- Topic: Type topic or name for your meeting.
- Start: Select a date and time for your meeting. You can start your meeting at any time before the scheduled time.
- Duration: Choose the approximate duration of the meeting. This is only for scheduling purposes. The meeting will not end after this length of time.
- Time Zone: By default, Zoom uses your computer's time zone. Click the drop-down menu to select a different time zone.
Want to make the meeting recur? Check the Recurring meeting check box.
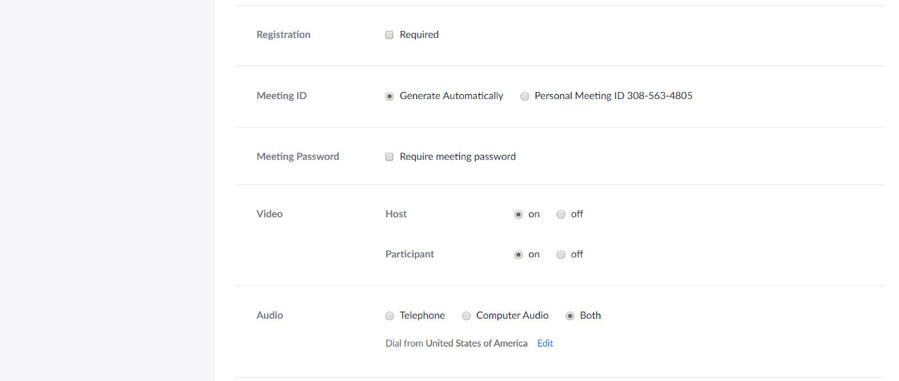
- Registration: Choose if you would like registration to be required (not typically recommended).
- Meeting ID: Choose if you would like to generate automatically or to use your personal meeting room.
- Meeting Password: You can select and input your meeting password here. Joining participants will be required to input this before joining your scheduled meeting.
Note: The meeting password must meet these requirements.- 10 characters maximum
- Passwords are case sensitive
- We recommend using alphanumeric characters and these special characters: @ * _ -
- The Zoom desktop client allows alphanumeric characters and these special characters: @ * _ -
- The Zoom web portal allows any characters, but the these characters are not allowed: & <> \
- Video
- Host: Choose if you would like the host video on or off when joining the meeting. Even if you choose off, the host will have the option to start their video.
- Participant: Choose if you would like the participants' videos on or off when joining the meeting. Even if you turn off, the participants will have the option to start their video.
- Audio: Choose whether to allow users to call in via Telephone only, Computer Audio only, or Both.

- Meeting Options
- Enable join before host: Allow participants to join the meeting without you or before you join. The meeting will end after 40-minutes for Basic (free) users if 3 or more people join the meeting.
- Mute participants on entry: If join before host is not enabled, this mutes participants as they join the meeting. Participants can unmute themselves after joining the meeting.
- Enable waiting room: This setting allows the host to have participants wait until the host joins and then admit either one by one or all attendees in at one time. This makes the Enable join before host option impossible. This is not something we recommend.
- Only authenticated users can join: This selection would make it a requirement for participants to authenticate prior to joining the meeting. This is another layer of security if you need it.
- Breakout Room pre-assign: If you have scheduling privileges for other users, you will be able to select who you want to schedule for from the drop-down menu.
- Record the meeting automatically on the local computer: Check this if you want the meeting to be automatically recorded.
- Alternative hosts: Type the email address of another licensed Zoom user on the University account to allow them to start the meeting in your absence.
Previous Meetings
The Schedule a Meeting button will be at the top with a list of your previously attended Zoom meetings appearing below.
Personal Meeting Room
Your personal room is your assigned classroom space, equivalent to a building and room number location in the university setting. If you need to create a quick on-the-spot meeting or to set up recurring one on one meetings then this might be a good route to take.
Most of the screen is strictly information as you cannot change the fields. The three active pieces on the screen are as follows:
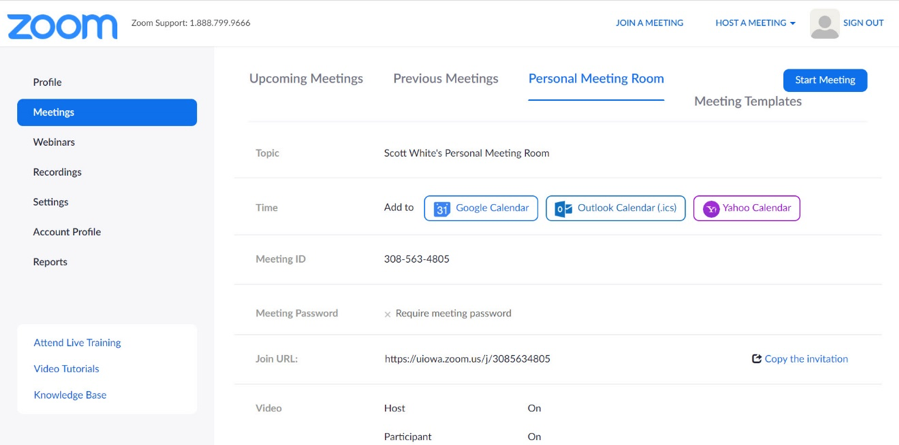
- Start Meeting: Launches Zoom with you as the lone participant. Use the Invite control to invite others to join your meeting.
- Meeting Templates: When wanting to have the same settings for different meetings, here you can create a template from an existing meeting. There must be a meeting on the schedule for you to use it as a template. See more on Using Meeting Templates.
- Time: Includes the options to add a meeting to your calendar of choice, Google, Outlook, or Yahoo.
Updating Scheduled Meetings
To make scheduling consistent and most reliable, we recommend that you use the University of Iowa Zoom account URL, https://uiowa.zoom.us, as the starting point.
- Click Sign In and complete the sign in process.
- Click Meeting from the left navigation controls.
- Click the link for the meeting you wish to update.
- Complete the fields the same as laid out in Scheduling Meetings.
Using Meeting Templates
When you schedule a meeting, you can save the settings for that meeting as a template for scheduling future meetings. The template includes settings like enabling join before host, automatic recording, and alternative hosts. For recurring meetings, you also have the option to save the recurrence schedule as part of the template.
After you save a meeting as a template, you can select that template when you want to create a meeting with similar settings. To create a template, complete the following steps:
- Click Sign In and complete the sign in process.
- Click Meeting from the left navigation controls.
- Click Schedule a Meeting.
- Change the settings that you would like to apply to the template.
NOTE: All settings made while scheduling the meeting will apply to the template. This includes polling.
- Click Save.
- Click Save as a Meeting Template.
7. Specify the template name, then click Save as Template.